Account Billing & Payment Terms
Choose account Billing Types and Net Terms for a new store, import payment terms with an Accounts CSV, and configure invoices, statements, credit limits, and past-due controls.
Set-up your customers' billing terms when importing them through the Accounts CSV import, or through the Zoey Admin.
A customer's Billing Type determines whether they pay at checkout, pay individual invoices, or pay on a statement schedule.
Their Net Terms determine when payment is due by, the credit limit, discounts, late fees, and customer-facing payment instructions.
1. Choose a Billing Type for each account
- Pre-Pay: The account pays when placing an order, and Net Terms are disabled. Choose this if you collect payment at checkout rather than offer deferred payment.
- Invoice: The account pays each invoice separately according to its payment terms, and Net Terms are enabled. Choose this if you bill orders individually and want each invoice to have its own due date.
- Statement: The account receives invoices grouped on a billing schedule and normally pays through the statement, and Net Terms are enabled. Choose this if you bill the account periodically instead of collecting payment against each invoice.
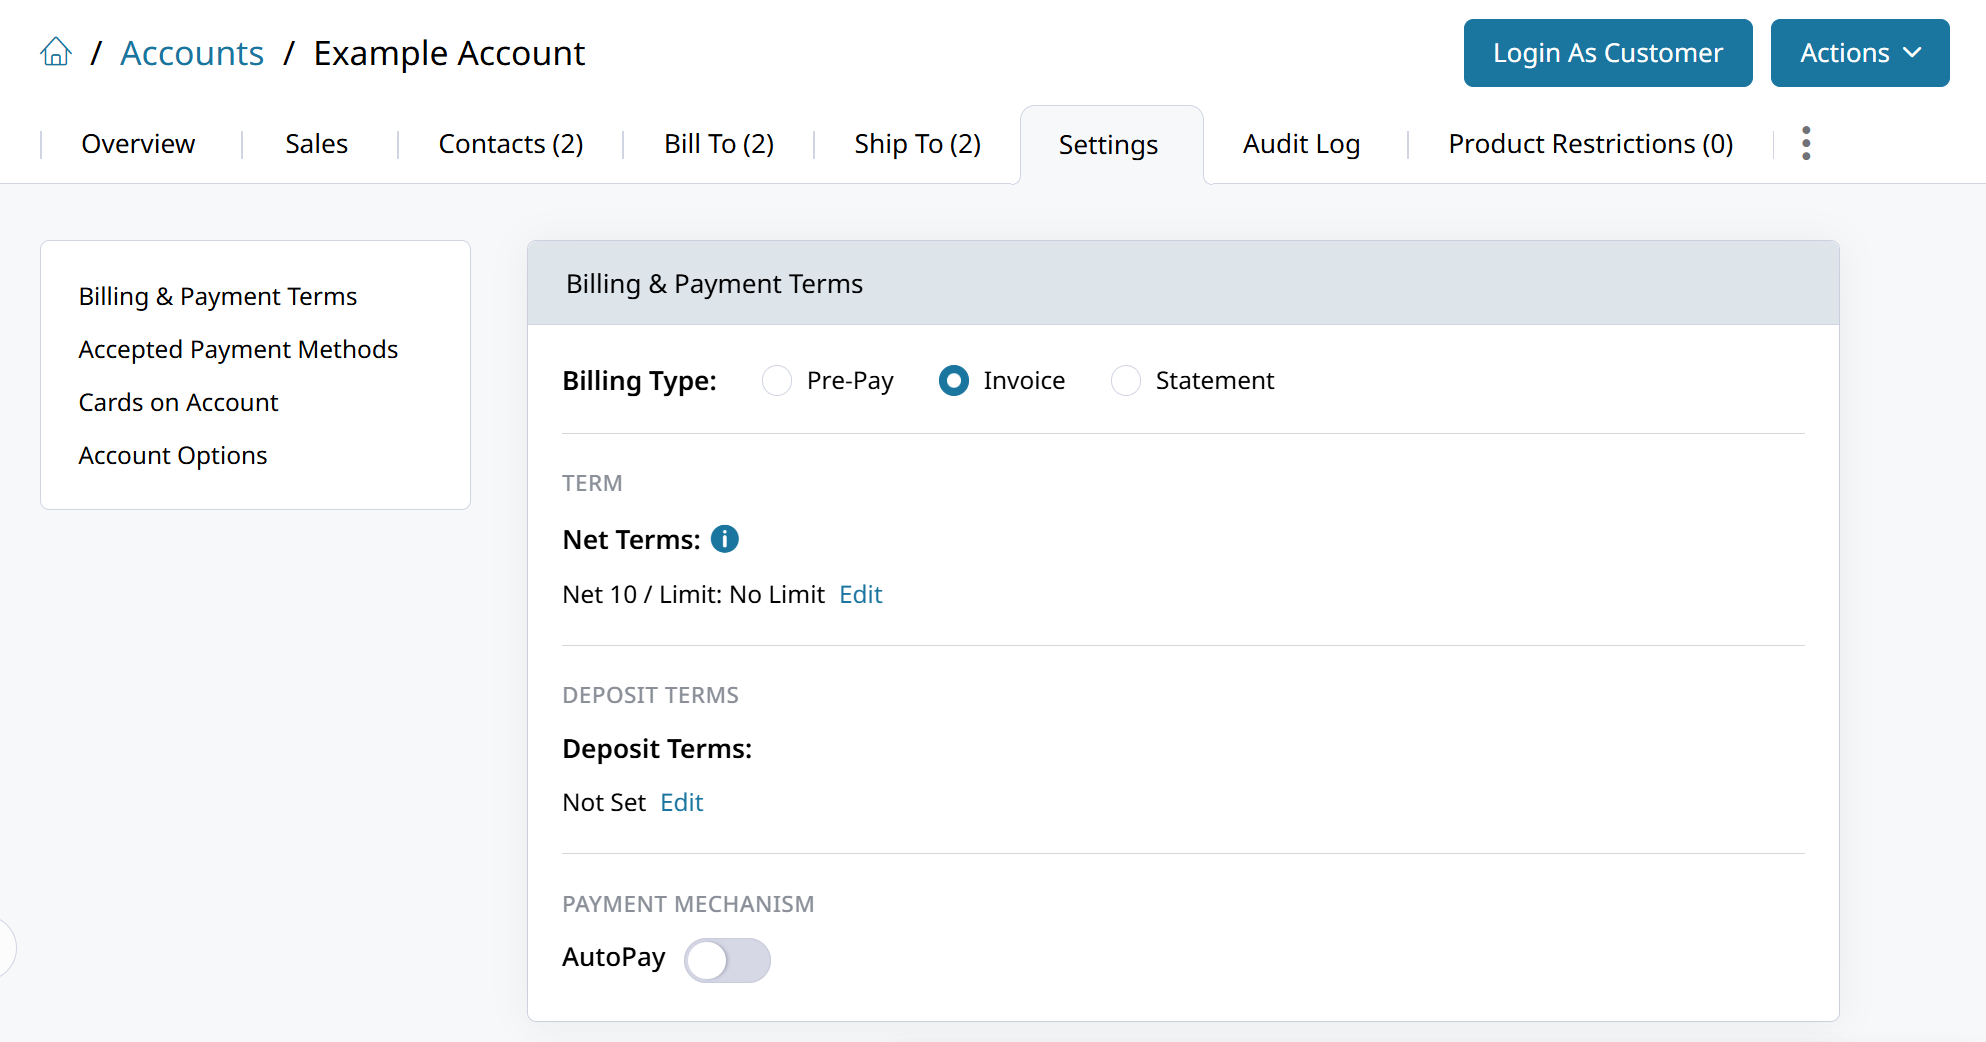
For Statement billing, choose the billing period and cycle start. If you enable Allow Payment by Invoice, the customer pays each invoice by its own due date; the statement still arrives at the end of the billing period as a summary but cannot be paid directly.
2. Add billing terms to your Accounts through CSV import
If you are creating accounts for a new store, add the payment-term columns to your main Accounts import spreadsheet before importing. This lets you assign Billing Types and Net Terms alongside the account data instead of updating each account afterward.
| CSV column | Values or format | Purpose |
|---|---|---|
account_name | Account name | Identifies the account in the import. |
account_billing_type | prepay, invoice, or statement (case-insensitive) | Selects how the account is billed. |
account_billing_period | Weekly, Bi-Weekly, Monthly, or Quarterly | Sets the statement schedule for Statement billing. |
account_billing_cycle_start | Date formatted according to your spreadsheet's locale settings | Sets the start of the statement billing cycle. |
account_net_term | For example, net10, net15, net30, net60, net90, or net_xy | Selects the account's Net Terms. Enter Net Terms values in lowercase without spaces. |
Use the columns that apply to your chosen Billing Type. For example, statement scheduling columns are for accounts billed by Statement, not for Pre-Pay accounts. The template below also includes requirements and tips for other import columns.
Account Billing Terms CSV Guide and Template
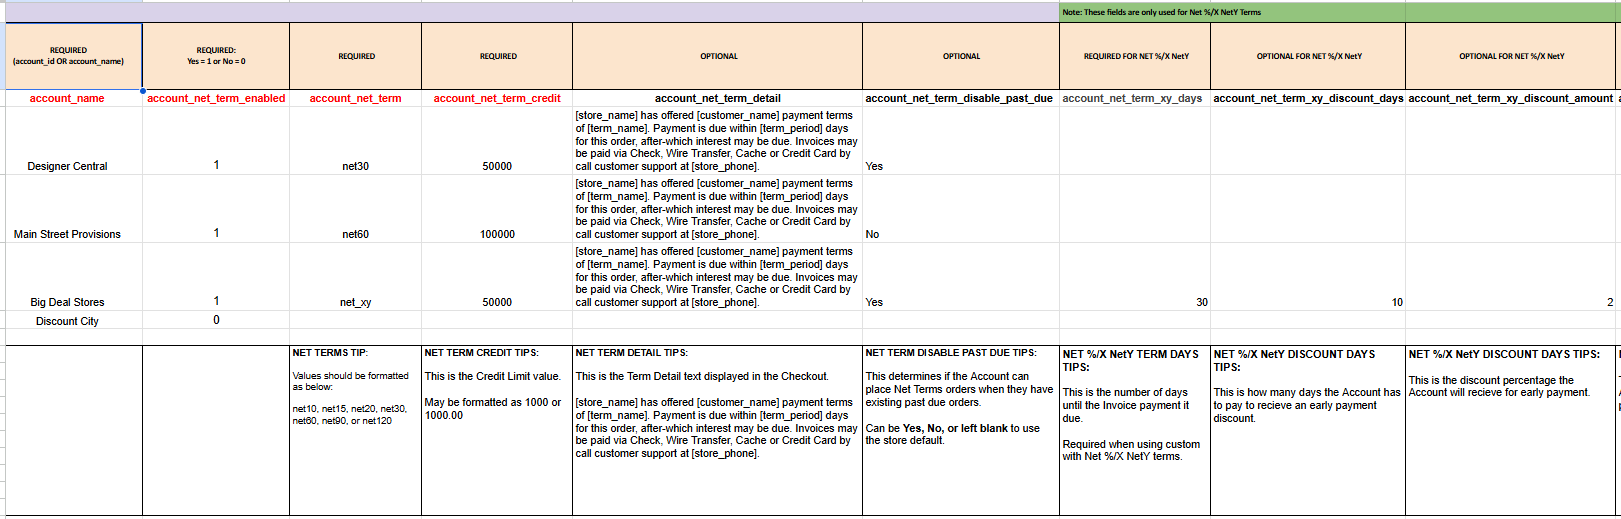
Save a copy of the Billing terms template to Google Drive or download the blank template as CSV. If you open the Google Sheets template, save a copy and review its two tabs:
- Guide lists requirements and tips for each column.
- Blank Template contains column headers for your account data.
Optional: Import custom Net %/X NetY terms
To set a custom term with an early-payment discount and late fee, use the following columns with account_net_term set to net_xy:
| CSV column | Sets |
|---|---|
account_net_term_xy_days | Term days. |
account_net_term_xy_discount_days | Discount days. |
account_net_term_xy_discount_amount | Discount amount as a percentage. |
account_net_term_xy_late_fee | Late fee as a percentage. |
3. Configuring terms on individual accounts
After importing, open an account from Customers > Accounts and go to its Settings tab. Select its Billing Type and payment terms, then review any credit limit, customer-facing term details, and past-due restrictions that apply to that account.
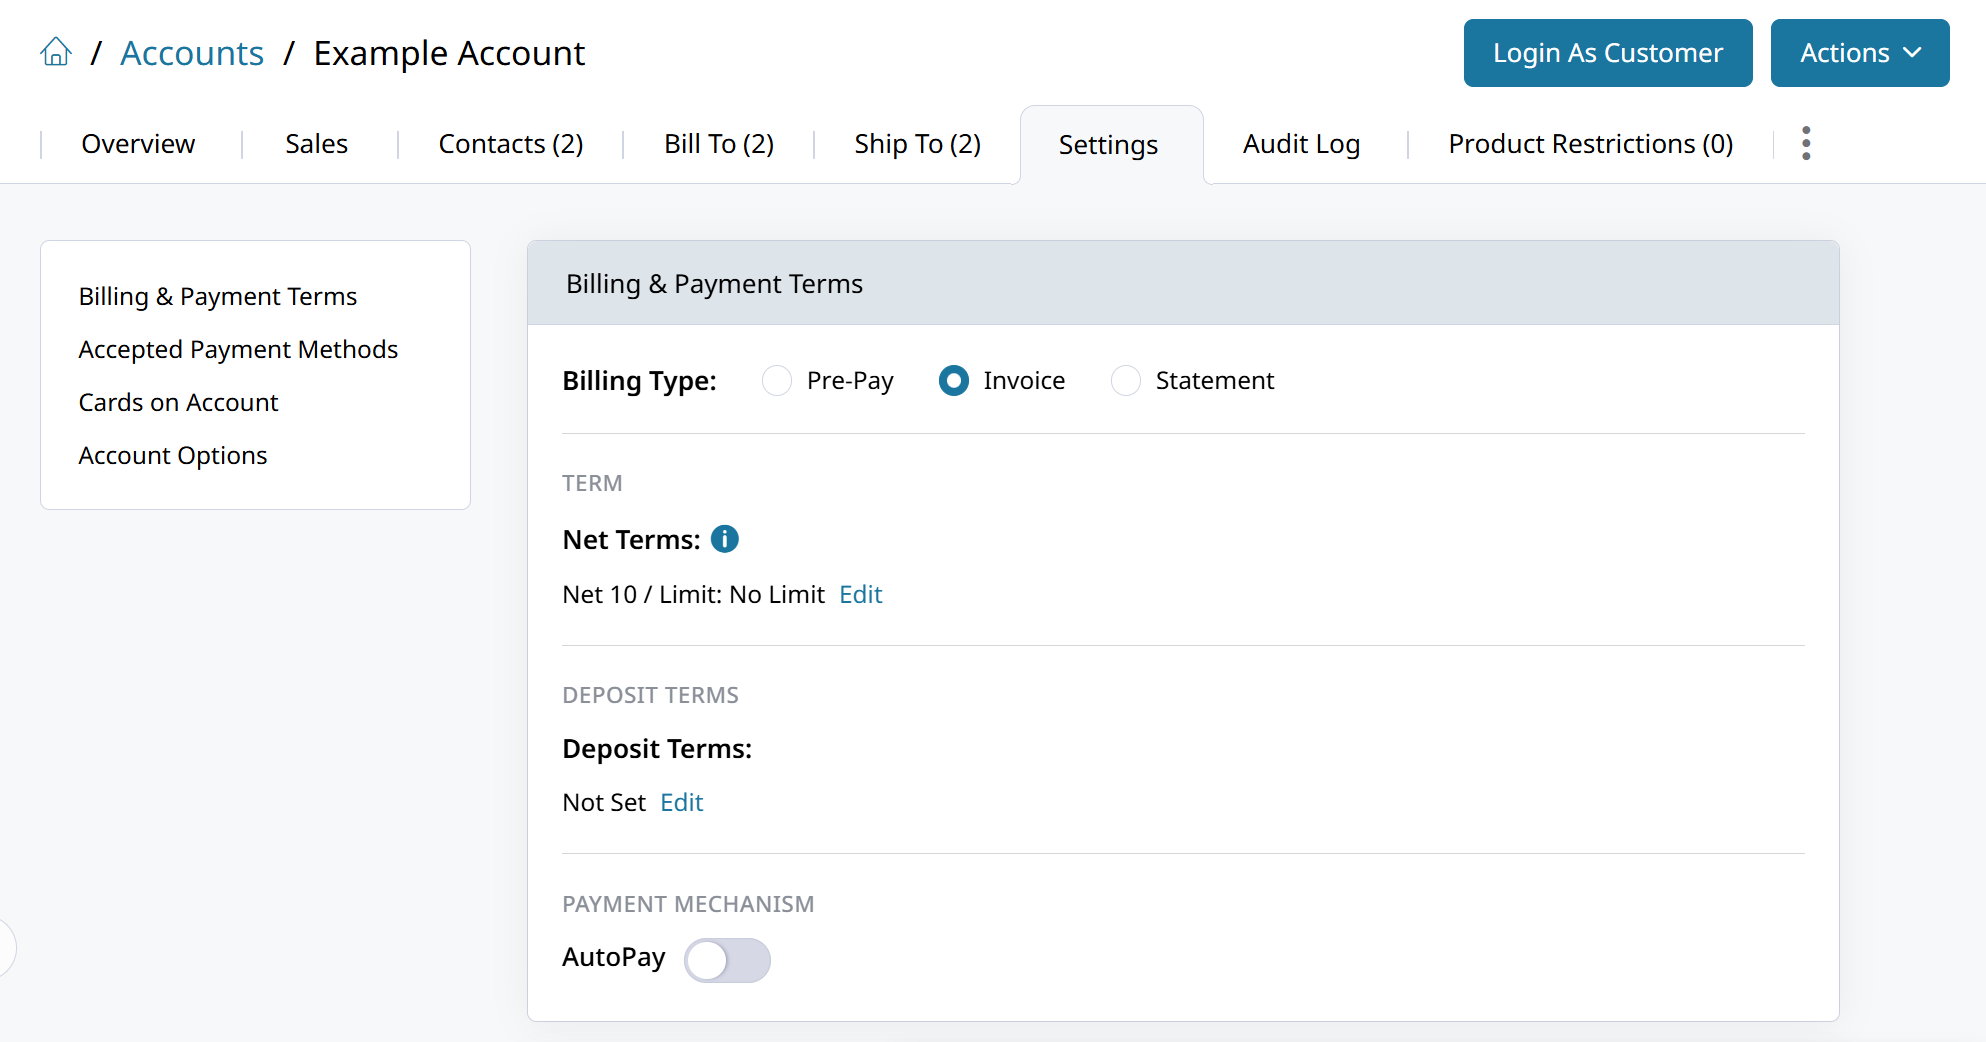
For Invoice billing, an invoice's due date is calculated from when the invoice is created, not necessarily when the order is placed. For Statement billing, the due date is calculated from the end of the billing period. If you want invoice due dates to start at shipment instead of order submission, configure invoice creation at the appropriate point in your order workflow before taking orders.
A Credit Limit caps unpaid purchases on Net Terms; once the account reaches its limit, additional Net Terms orders are blocked. You can also specify term details for the customer to see at checkout. Review the store-wide defaults under Web Settings > Customer Settings > Payment Terms before overriding them on individual accounts.
Optional: Restrict past-due accounts
Set a Past Due Day Limit in the store's customer payment settings to determine when past-due restrictions take effect. For an individual account, use the account settings to apply the default restrictions or enable restrictions that disable Net Terms, block all orders, or block quote submissions when the account is past due. Choose these controls before customers begin ordering so the behavior matches your credit policy.
Optional: Set up AutoPay and invoice payments
AutoPay can collect payment for eligible invoices on or after their due date, plus any configured grace period.
It does not create invoices. If a Statement account needs AutoPay on individual invoices, enable Allow Payment by Invoice; AutoPay does not automatically pay a statement.
Record offline payments when you receive them, and review open, paid, and void invoices and account balances to track what remains due.
Update Billing Terms for Accounts in Bulk
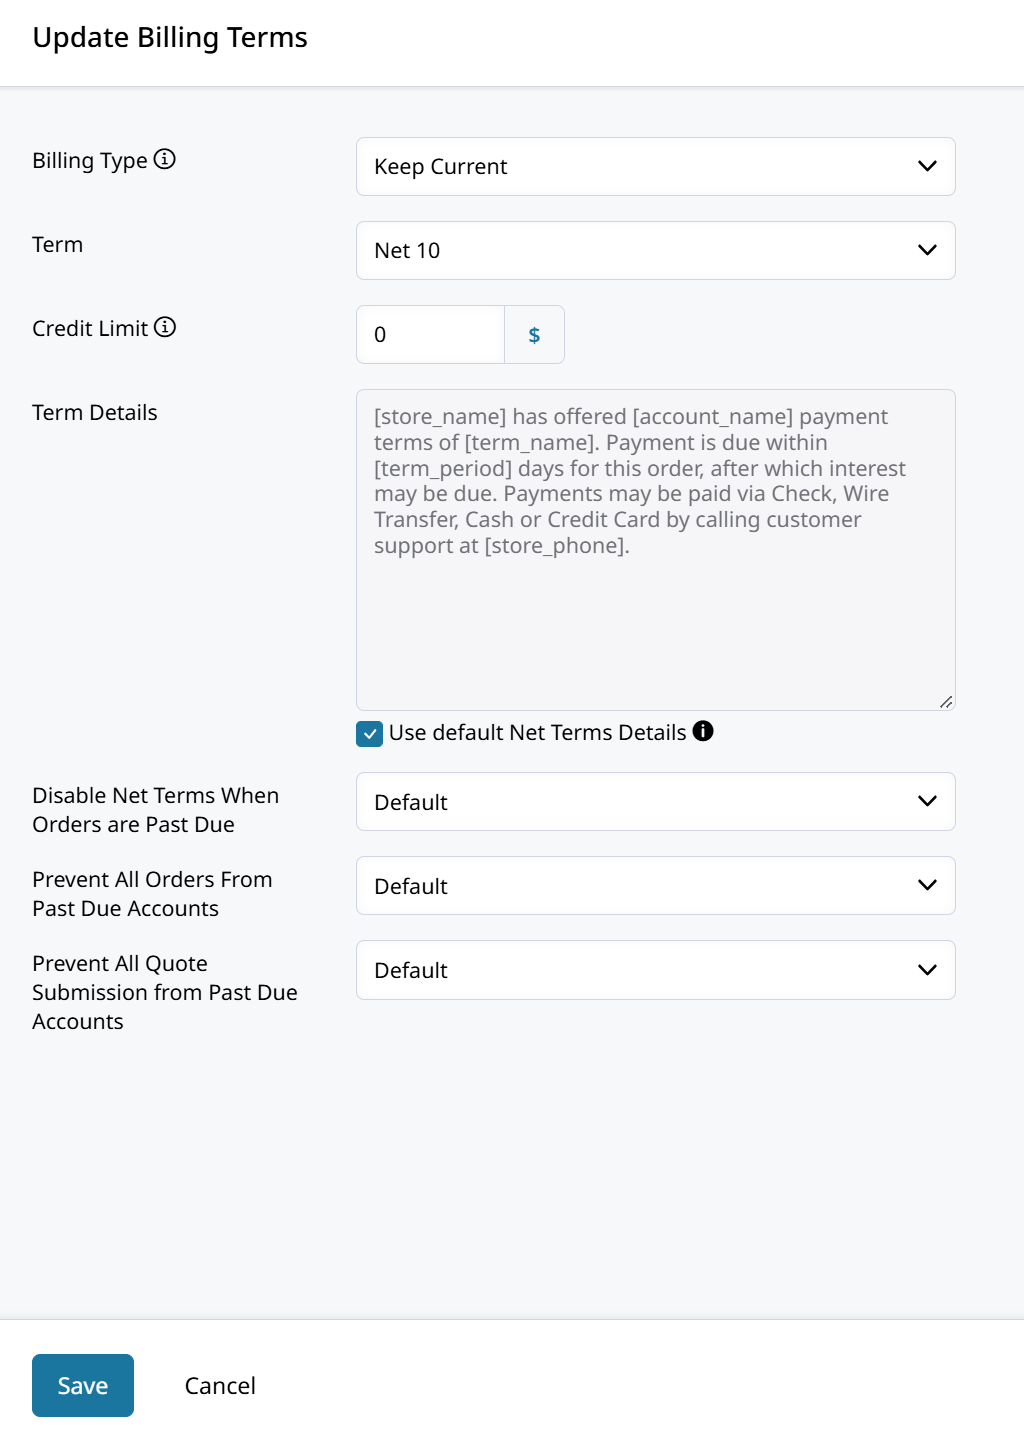
For accounts that already exist, go to Customers > Accounts > Bulk Actions > Update Billing Terms.
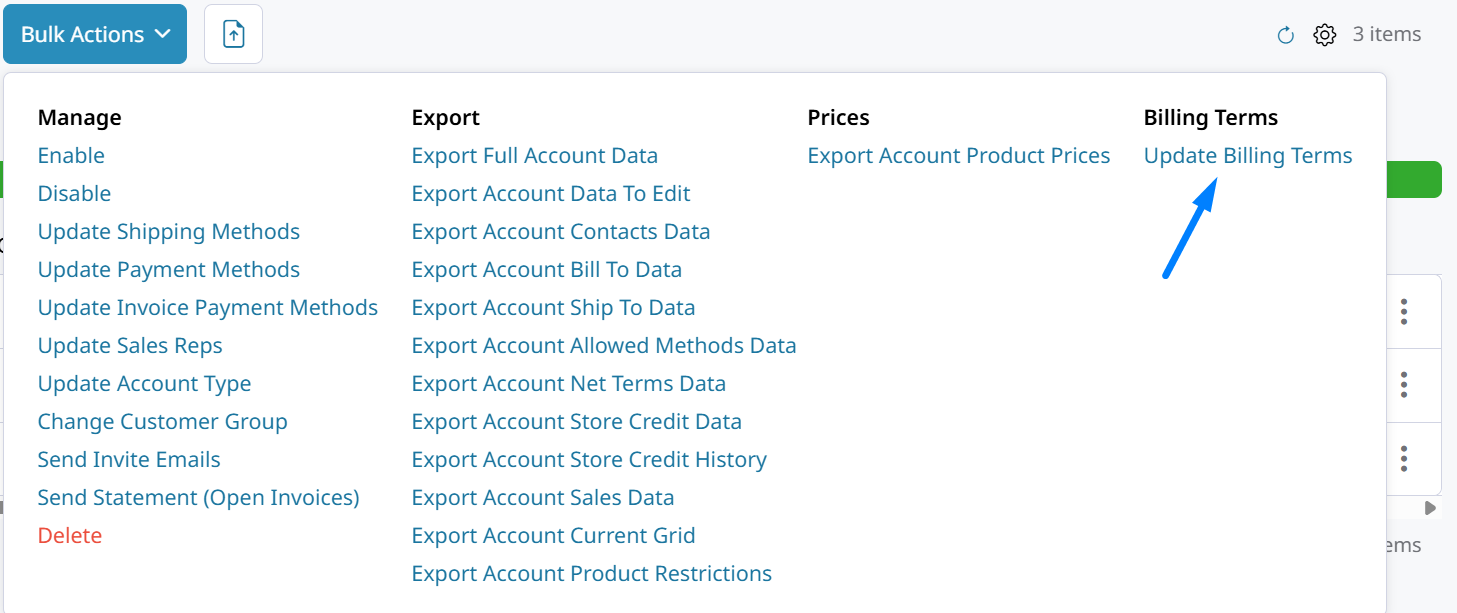
Select the accounts to update, then choose a Billing Type. Select Keep Current to leave each selected account's Billing Type unchanged. Select Pre-Pay to disable Net Terms, or Invoice or Statement to enable Net Terms. Set the terms, Credit Limit, and Term Details that apply to the accounts you are updating. Term Details set here override the global Term Details in Web Settings > Customer Settings > Payment Terms.
For more detail about billing behavior and account controls, see Customer Payment Terms.
Updated 19 days ago