Importing Ship Tos
Easily add multiple Ship To addresses an existing Accounts using the importer in the Ship To Tab within the Account screen. Or update multiple Accounts' Ship Tos using the main Account Importer.
Zoey automatically creates a locations when importing Accounts without ship Tos.When adding Ship-Tos to existing Accounts, please use the location ID or a new location will be created.
The Template
Please use the Guide for instructions on what each column header means and required fields.

How To Use This Template
Please Save a Copy of this template below. The Template will have 2 Tabs:
- Guide - This tab will provide requirements and tips for each column in the template.
- Blank Template - This tab will only contain the column headers for you to copy/paste your data into.
Using the Importer
Step 1: Prepare your file for import
Save Your File as a Comma Delimited CSVIf using Excel there are several CSV options. Please use CSV (Comma Delimited) (*.csv)
If you omit either thelocation_idorship_to_id, a new record will be created.By providing the ID for the Account Location or its Ship To Addresses, you are choosing to modify an existing location or address.
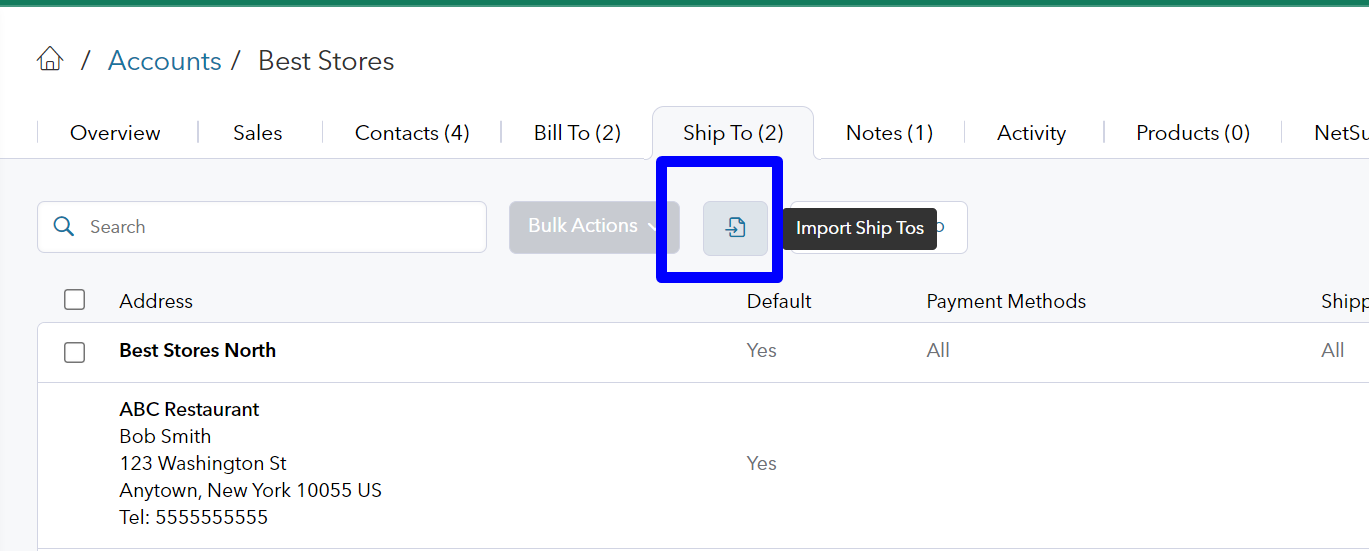
Step 2: Click on the Importer Icon in the Ship To tab.

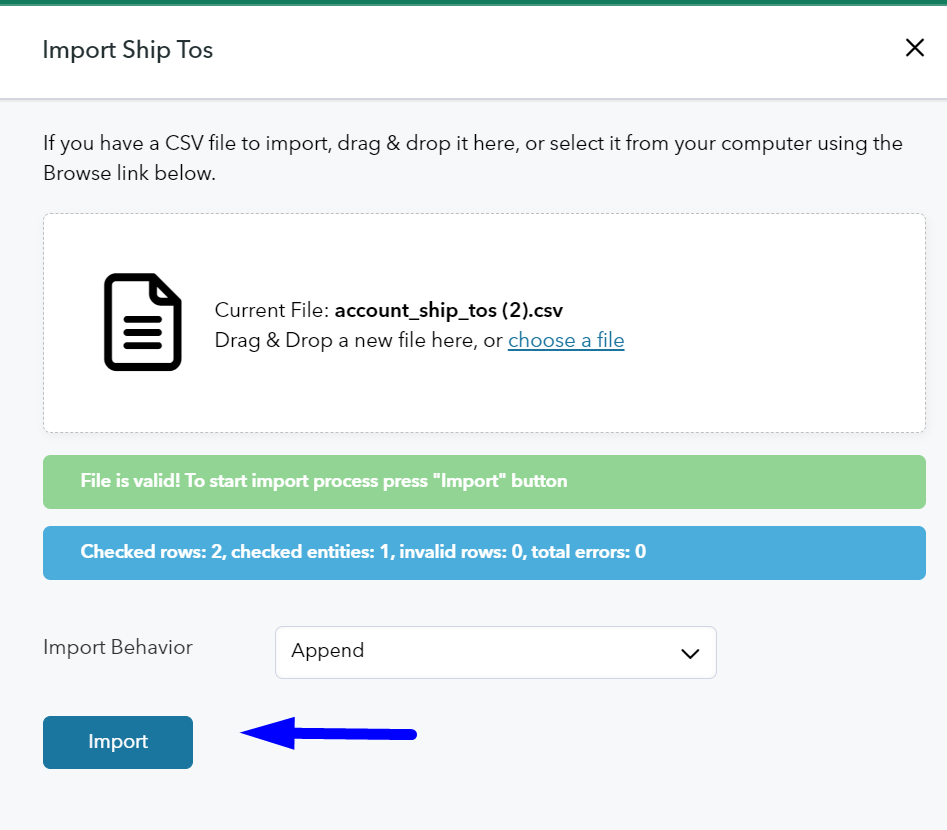
From here you can upload your file, use the Append Import behavior to check data.
When there are no import errors, click Import

If updating or re-importing Ship Tos, please use the Replace import behaviorIf address columns exist in the spreadsheet, Append may duplicate addresses that have already been imported if you do not include the
ship_to_idof the address you are changing.
You may import Ship Tos for multiple Accounts using the main Accounts Importer. Account_id is required.
Updated 5 months ago