Creating Your Categories
Whether you already have your products assigned to categories, or you are starting anew, categories allow your customers to easily find a set of closely related products. Your Category "Tree" will automatically appear in your Customer Portal's Header Navigation, so put some time and thought into how you want your categories setup/organized.
Option 1: Creating Your Categories in the Web Admin
You can use our drag & drop interface in the Web Admin to create your category tree. For a small number of categories (less than 50) this is our recommended method.
Step 1: Navigate To Products > Categories
In your Categories Page you will see the Category List to the left from where you can click on a Category to edit it or add a new one.
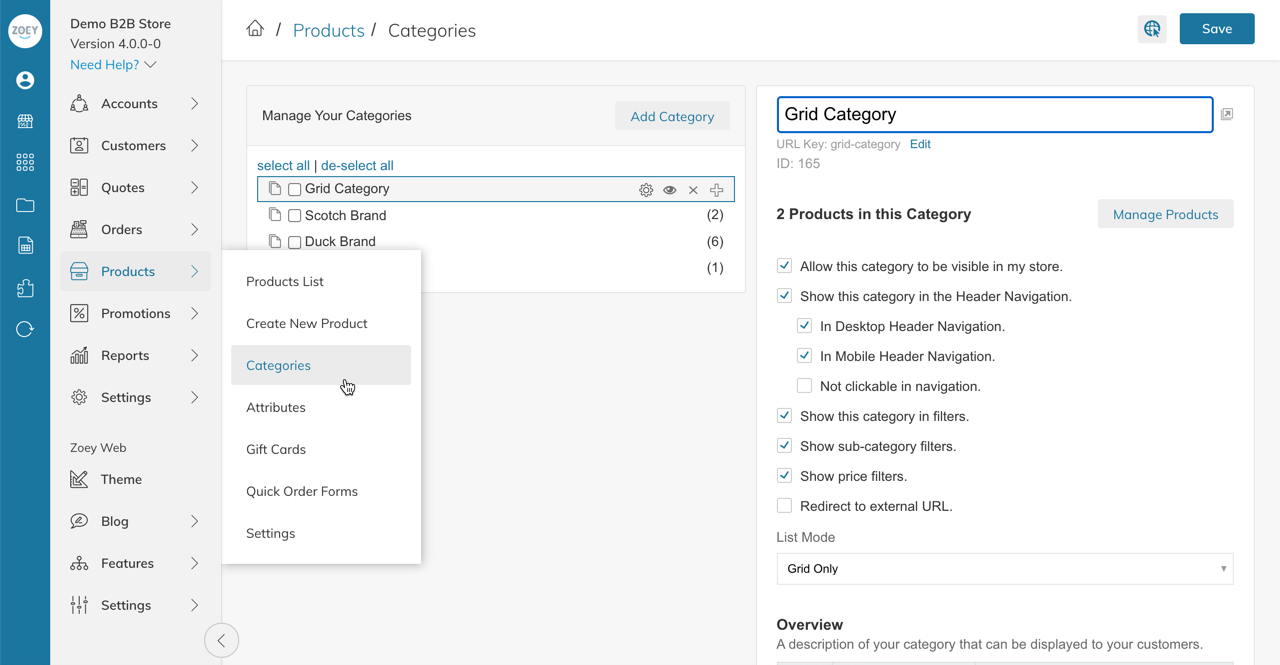
Step 2: Click "Add Category" and give it a name
Click on Add Category to the right of "Manage Your Categories" to create a new category.
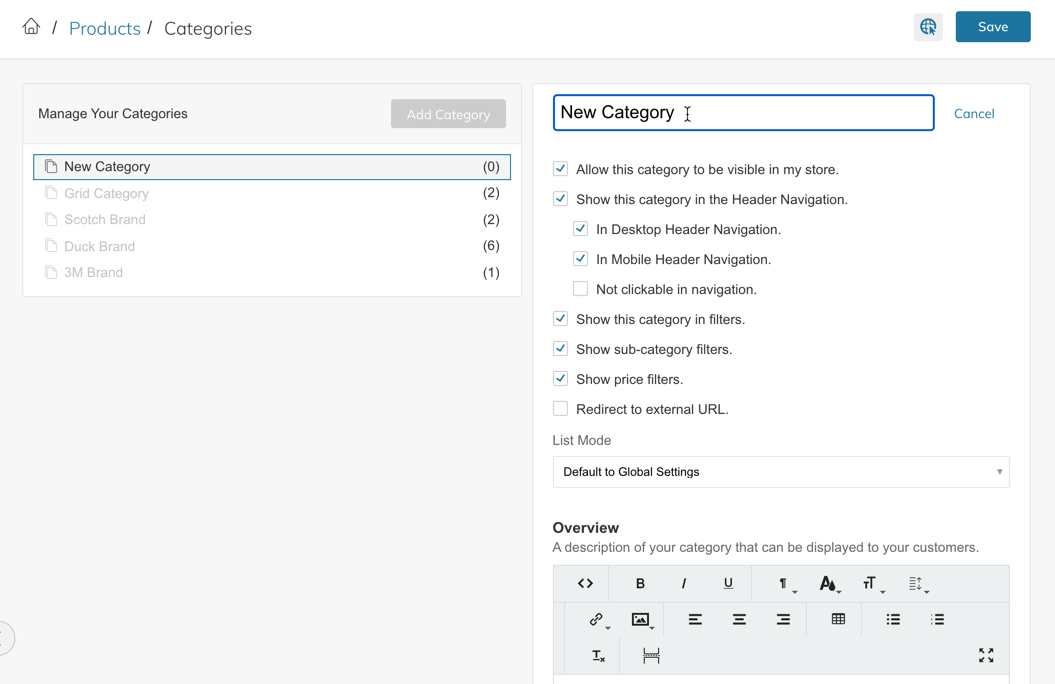
1. Category Name
Enter the name of the Category as it will display in your store (frontend).
2. Enable/ Disable
You can decide if the Category is enabled or disabled by checking off the box for Allow this category to be visible in my store.
By clicking on the "eye" icon in the Category Menu to the left you can control this, as well. If the eye is crossed through, the Category is disabled.
3. Automatically display in Header Navigation
If the box is checked for Show this category in the Header Navigation the Category will be added automatically to your Header Navigation. If the box is not checked the Category remains enabled and accessible with the direct URL, just not through the Navigation.
4. Not Clickable in Navigation
This setting will make the category link not clickable in the Header Navigation. This is typically used when a parent category like "Shop" needs to be in the Navigation, but the customer should not be able to click on it, rather they will need to click on links to the child-categories.
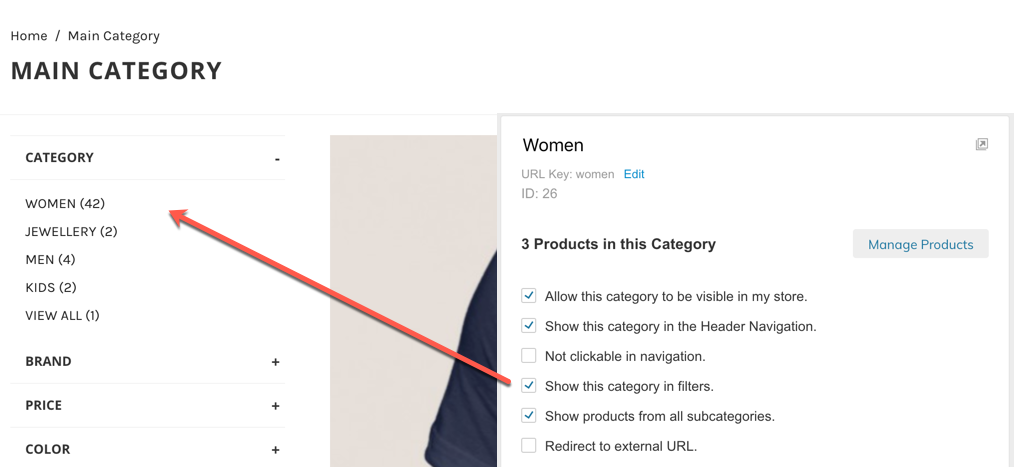
5. Show This Category In Filters
This setting controls whether or not the category will appear in the filters on parent category pages.
6. Show Sub-Category Filters
This setting controls whether or not the Category filter will show on this category page. Note: This setting only works if "Enable Sub-Category Filters on Category Pages" in Products > Settings is set to Yes.
7. Show Price Filters
This setting controls whether or not the Price filter will show on this category page. Note: This setting only works if "Enable Price Filters on Category Pages" in Products > Settings is set to Yes.
8. Show Products from all Subcategories
This setting controls whether or not the products assigned to this category's sub-categories will be shown to the customer when on this page.
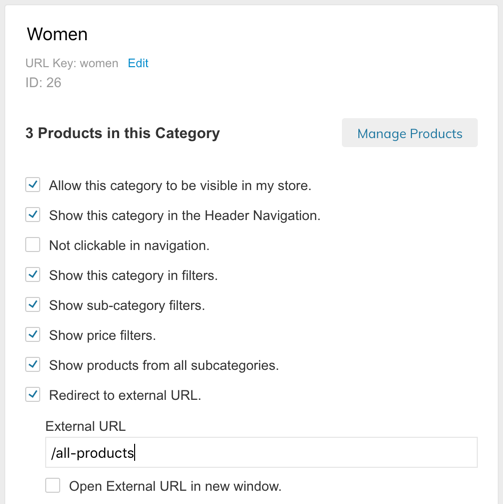
9. Redirect to external URL
If you want to redirect your category to an external URL or you want it to open in a new tab, check this box and enter the full URL. If required, check the box to Open External URL in new window.
10. List Mode
This setting controls the view of the products on this individual category page. Set to "Default To Global Setting" for the page to use the setting from Web Settings > Product Settings > Catalog
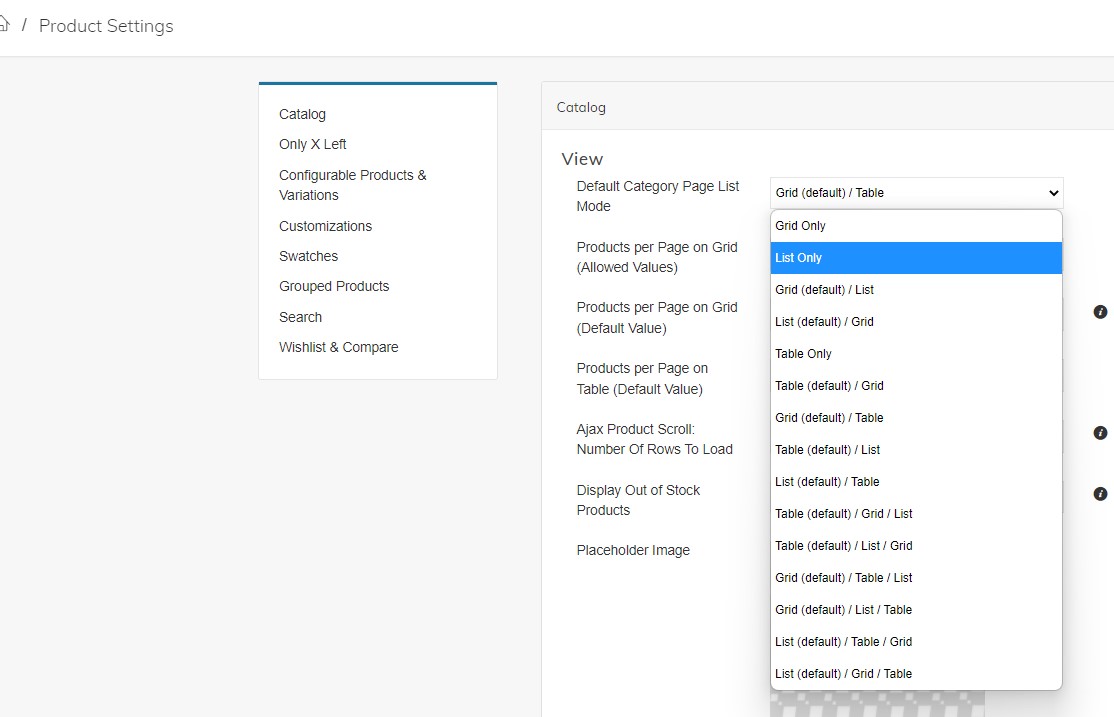
11. Overview
Enter a description of your Category that can be displayed in the Category page, visible to your customers.
Display the Category Description (Overview)The Category Description will only be visible in the frontend if you add a Category Description Block to your Category template within Edit My Design.
12. Category Images
Go to Products->Categories and click on a category. Scroll down to the Images section and click on Add Images to open the Media Storage or Drag and Drop an image.
Click here to learn more about Category Images
Category ImageWhen adding a new category you need to save first, then you will see the field to upload category images.
The category image and thumbnail will be visible on the frontend only if you have the Category Image Block or the Category Thumbnail Block added to the category template.
13. Edit My Design
Once you give the Category a Name and thenSave , you will be given the option to edit the design. From the drop-down menu, you can assign a different Category page template and customize the design and layout for specific categories from withinEdit My Design**.
14. Additional Category Info
This information can be added to your category template using the Visual Design Editor's Additional Product Information block. It is also used for the Mega Menu.
Step 3: Repeat Step 2
Then organize your Categories into a hierarchy/folder structure that will make the most sense for your customers and sales reps while browsing products on the Customer Portal and Sales Rep mobile app.
Step 4: Save and Refresh
After completing your configurations, click Save Category from the top right corner.
You may be notified to refresh to view your changes. Only click this button if you are finished with your changes and ready to see them on the front-end
Creating Sub-Categories (Child Categories)
Your Categories exist as navigation links that display as standalone items (top level Categories or Links), or they can display as a collection of links within a navigation drop-down menu.
The order in your Category List determines the order in your Header Navigation in the frontend. If you want to change the order you can do this any time by dragging the categories into the desired position.
To place your new Category inside another Category, click on it and drag it until you see a + icon. This indicates that it will add the Category to another one, creating a folder. You may also click on the + icon of a category to create a new "child" sub-category.
*Note: Categories on the CSV are case sensitive.
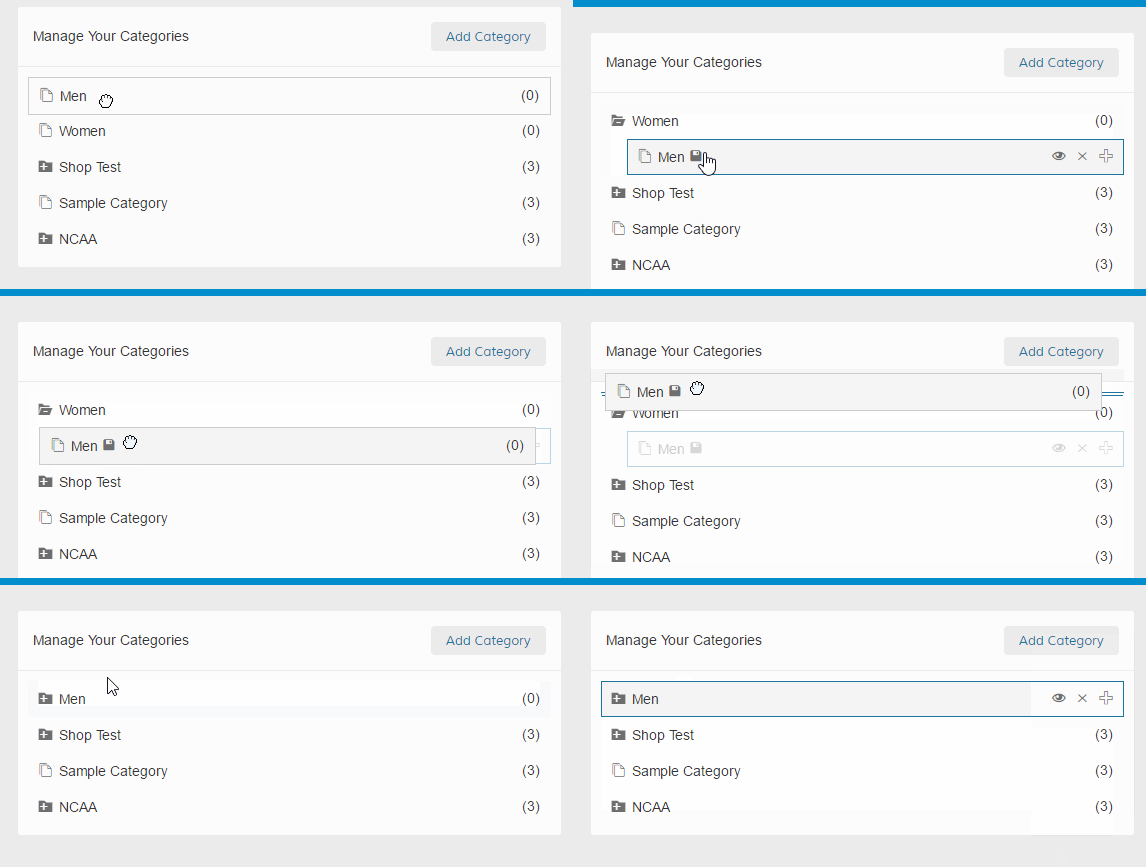
Make sure to save the changes by clicking in the top right of your Category page Save All Categories.
TIP: Export FirstIt will be much easier to work with this data if you first Export your Categories. See https://support.zoey.com/docs/export-categories for more information
Option 2: Importing Your Categories via CSV
You may use a CSV spreadsheet for category creation in Zoey. Use the links to below to View, or Make A Copy of our template to save in your Google Drive.
You are going to want to import your categories in multiple steps.
- Import your Top Level Categories - this will allow you to export a list of the top-level category IDs
- Create an Import CSV file for "Sub-Categories" or child categories. It's the same format, but you will fill in the parent_category_id fields from step 1 into the rows of the categories you are going to create in this step.
- Repeat step 2 if you have 3 or more sub-levels of categories (like Mens > Shirts > Polos)
This is what our template guide looks like.
How To Use This Template
You will be given the option to View or Save a Copy of the template. We recommend saving a copy.
The Template will have 2 Tabs:
- Guide - This tab will provide requirements and tips for each column in the template.
- Blank Template - This tab will only contain the column headers for you to copy/paste your data into.
Or click here and go to File > Download >CSV to download a CSV
Updated 9 months ago