Creating a New Account
Add a New Account by going to Customers > Accounts and selecting Add New Account.
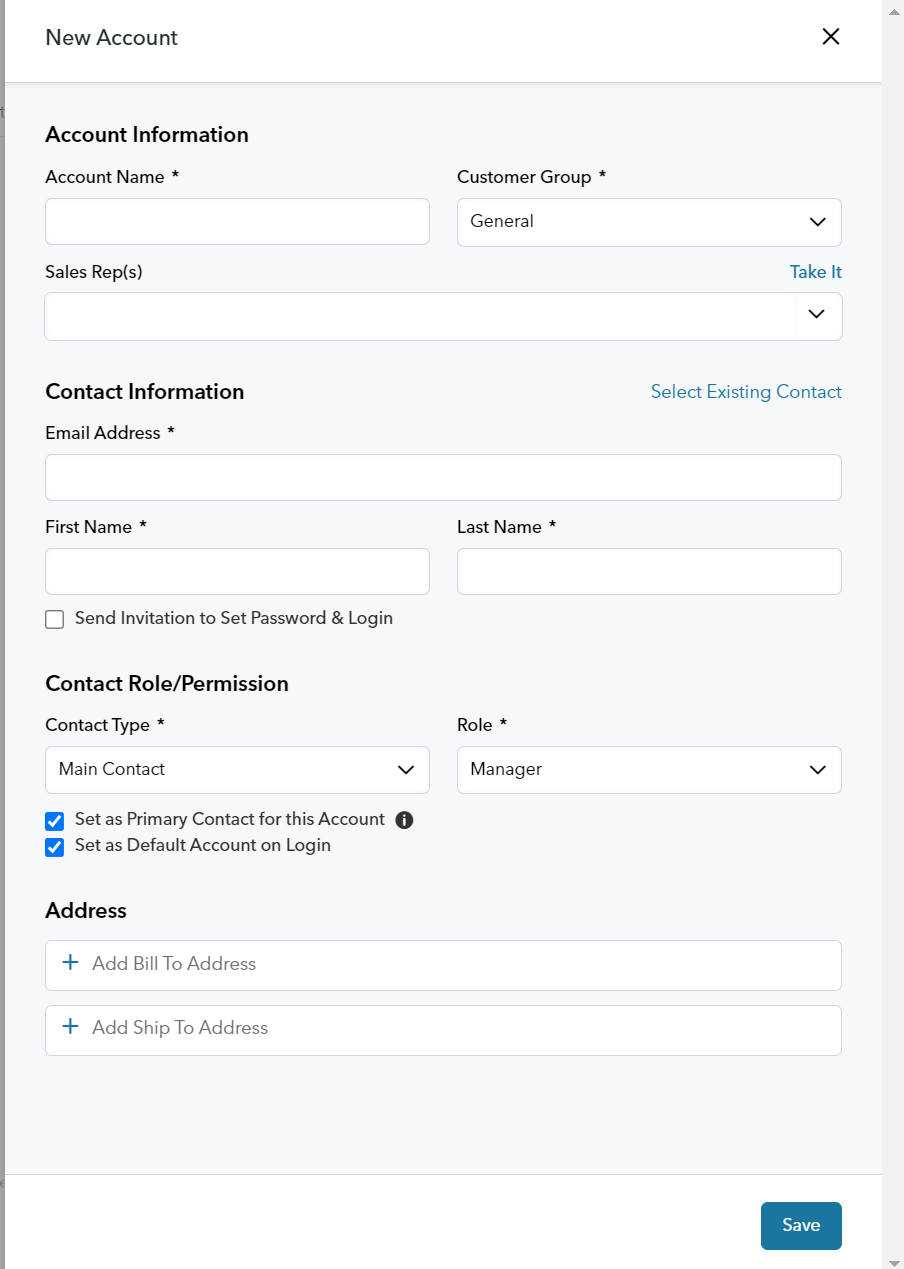
When creating an Account, you will be presented with the following fields.

Any field with an asterisk is required.
Account Information
- Account Name - This is the name of the Account or Company you are adding.
- Customer Group - Any new customers (including the account Manager) that are invited to the account will be assigned this Customer Group by default. The Customer Group for the Account determines the Price List and settings within the customer portal.
- Sales Rep(s) - The assigned Sales Rep(s) will have all of the orders and quotes for this account attributed to them unless otherwise specified by the Admin user creating the Order or Quote.
Contact Information
You may Select an Existing Contact to assign to the Account or create a new one.
- Email Address - An account may have one or more contacts. You will be able to add more contacts once the account is saved. An email addresses is required to create an Account / Contact.
- First Name - The first name of the contact may or may not be required. You may change these settings in Customers > Attributes > Contact tab.
- Last Name- The last name of the contact.
- Checkbox to Send Invitation to Set Password & Login
What if I don't have an email address?If you do not have an email address for a contact, create a temporary fake email address using your company domain, such as [email protected]. Each temporary email address should be unique or serialized (temp1@, temp2@...) Do not add the same fake email address to multiple accounts.
Contact Role/Permission
- Contact Type - Main Contacts and Additional Contacts have unique Roles that can be assigned to them. Main Contacts will be assigned to a Main Contact Role. There can be multiple Main Contact Roles and multiple Additional Contact Roles with varying permissions.
- Role - Location Contacts have unique permissions that can be assigned to them. Additional Roles can be added in Customers > Roles & Permissions
- Checkbox to Set as Primary Contact for this Account. The Account Primary contact is used when there are multiple main contacts on one account.
- Checkbox to Set as Default Account on Login Specifies if this account is the default account selected when the contact logs in to the portal. Most useful when a contact belongs to multiple accounts.
Address
- The Bill To address is used in payment processing as the billing address for the Account. Additional Bill To addresses can be added after the Account is created.
- The Ship To address is best thought of as where shipments are received. A default Ship To is set during account creation. The Ship To are used so that orders are shipped to your Account's department, warehouse or region.
Upon saving a new Account, you will be presented with more options
Notes
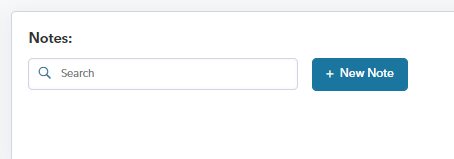
Accounts may have multiple Notes posted to them. Notes are searchable and can be tagged to specific Locations. Notes can be edited or deleted.

Net Terms
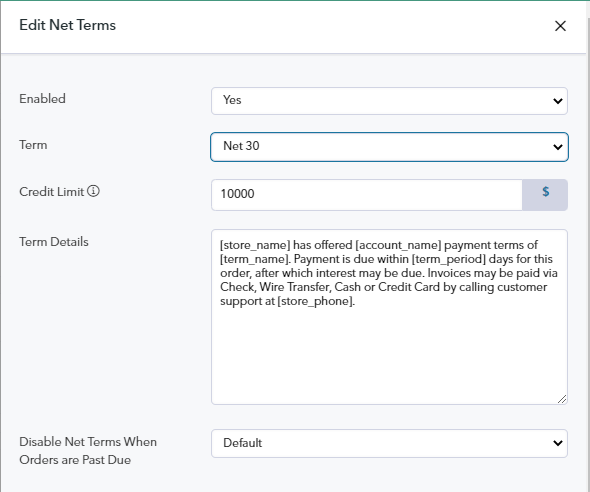
An Account may be given a Net Terms account with a specified Term or payback period, and Credit Limit.

Cards on Account
Credit Cards through Authorize.net, Stripe and Braintree can be saved on the Account and used by all contacts when placing orders. This way each contact does not need to enter the company credit card when submitting pre-pay Orders.

Account Options for Payment and Shipping Methods
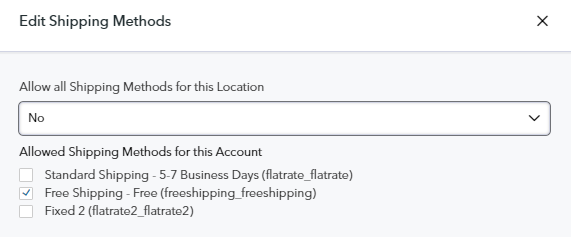
Allowed Shipping and Payment Methods can be configured at the Company level and refined for each Ship To Location.


Creating Additional Contacts
Add additional contacts in the Account Edit > Contacts Tab > +Add Contact

Here, you will be presented with fields to enter new contact information and assign a contact type and role, or select an existing contact to add to the account.
Additional Contacts may be restricted to one or more locations for which they can submit and manage orders. They will not be able to see or manage all Account orders, only their location's orders.

Updated 10 months ago